



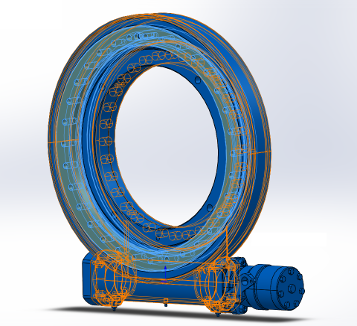
What is a slew drive? A slew drive is a compact unit that combines a slewing bearing, a gear drive, a housing, and a motor interface. It rotates a load and carries axial, radial, and tilting forces at the same time.
Once the unit is on your mounting surface, the next question is how to apply slew drive bolt torque so every bolt carries its share. This guide gives field technicians a repeatable sequence. It builds on the torque values from the manufacturer's drawing and manual, and it does not replace them.
What You Need Before the First Bolt Turns
Most bolting problems start before the wrench is picked up. A missing torque value or a dirty seat will cost you more than a slow tightening pass. Gather the items below first.
| Prerequisite | Why it matters | Blocks progress? |
|---|---|---|
| Torque value from the unit's drawing or manual | Value depends on bolt grade, thread size, and lubrication condition | Yes. Do not start without it. |
| Bolt grade and lubrication state | A dry bolt and an oiled bolt reach different clamp loads at the same torque | Yes |
| Calibrated torque wrench in the right range | Wrenches read least accurately at the bottom of their range | Yes |
| Mounting surface flatness check | A warped seat loads some bolts more than others, however well you tighten | Yes |
| Hardened washers and clean threads | Debris and burrs change friction and give false torque readings | Yes |
| Paint marker for witness marks | Lets you spot movement at the retorque check | No. Can be sourced on site. |
Material also plays a role. The structure under the drive may be steel plate or a cast base, and the drive housing itself may be ductile cast iron, alloy steel, or stainless steel. Hard, flat seats hold preload well. Painted or soft seats lose preload as the coating settles, which is why the retorque check later in this guide exists.
If you are replacing a unit, confirm that the new slew drive has the same bolt circle and bolt count as the old one. A different bolt grade on the new drawing means a different torque value. Never reuse the old number.
Step-by-Step Bolting Sequence
Follow these steps in order. Each checkpoint tells you what a good result looks like.
- Clean and inspect the seat. Remove paint ridges, rust, and weld spatter from both mating faces. Checkpoint: a straightedge laid across the seat shows no visible gap, and a hand run across the face finds no raised spots.
- Mark the high point. Many slewing bearings carry a soft-spot or hardness-gap marking. Check the drawing and place that mark where the manual says, usually away from the main load zone.
- Seat the unit and start every bolt by hand. Thread all bolts with washers until they touch. Checkpoint: each bolt turns freely by hand. If one binds, stop and clean the thread.
- Snug the bolts in a cross pattern. Number the bolts around the circle. Tighten one, then the one opposite it, then move a quarter turn around the circle and repeat. Do not go bolt by bolt around the ring.
- Apply the first torque pass at a low fraction. A common field schedule uses about 30% of the specified value. Use the schedule on your drawing if it gives one.
- Apply the second pass at about 60%. Use the same cross pattern. Checkpoint: the gap between flange and seat is still even all the way around.
- Apply the final pass at 100%. Use the same pattern again, then make one more circular pass in order. This last pass catches bolts that relaxed while their neighbors were tightened.
- Add witness marks. Draw a line across each bolt head, washer, and flange. Any later movement will show as a broken line.
- Repeat for the second flange if the drive bolts to a structure on both sides. Finish one side fully before starting the other.
Why Sequence, Staged Passes, and Retorque Checks Prevent Joint Slip
A single heavy pull on one bolt tilts the flange. The bolts next to it then loosen slightly. This is how uneven flange loading starts, and it is why the order of slew drive bolt torque matters as much as the value itself.
| Practice | What it does | Failure it prevents | Limit |
|---|---|---|---|
| Cross-pattern order | Pulls the flange down evenly from opposite sides | Flange tilt and local gaps | Does not fix a warped seat |
| Three staged passes | Lets the joint settle between passes and spreads clamp load | Neighbor bolts losing preload | Adds time. A two-person crew speeds it up. |
| Final circular pass | Confirms every bolt holds full torque | One loose bolt hidden in the set | Reads torque, not true clamp load |
| Retorque after first run-in | Recovers preload lost to gasket, paint, and surface settling | Joint slip, fretting, bolt fatigue | Interval comes from the manual, not from a guess |
Joint slip is the real risk. When clamp load falls, the flange can shift a small amount under every swing cycle. That movement wears the seat and shears the bolt shank over time.
The retorque check is your insurance. After the first short run-in under real load, recheck each bolt at the specified value, working in the same cross pattern. Compare the witness marks first. A line that has moved tells you which bolt to inspect before you apply torque.
This applies best to heavy-duty cyclic loads such as cranes, platforms, and excavators. It applies less to a lightly loaded tracker that swings slowly, though the sequence still costs you nothing.
Request Your Custom Slew Drive or Bearing Spec
Tell us your load, speed, and environment — receive a tailored 100–5000 mm slewing drive or slewing bearing proposal with 3D drawings within 24 hours.
Common Mistakes and What They Look Like
- Going around the ring bolt by bolt. Effect: one side of the flange sits high. Fix: loosen all bolts and restart with the cross pattern.
- Using one pass at full torque. Effect: later bolts read correct, but early bolts lose preload. Fix: run the full staged schedule again.
- Reusing a torque value from a different unit. Effect: bolts are under- or over-stressed. Fix: read the value from the drawing for this exact model and bolt grade.
- Tightening over wet or fresh paint. Effect: torque holds at first, then drops as the paint compresses. Fix: strip the paint from the seat and retorque after run-in.
- Skipping the retorque check. Effect: a loose bolt shows up as a rust trail or a rattle weeks later. Fix: put the check on the commissioning sheet.
- Using a wrench past its calibration date. Effect: every reading is wrong by the same amount. Fix: verify the wrench before the job.
Completion Check and Recovery
Do not call the job finished when the last bolt clicks. Use this checklist before you release the machine to work.
- All bolts reached the final value in the last circular pass.
- Witness marks are intact on every bolt, washer, and flange.
- A feeler gauge or visual check shows no gap between flange and seat.
- The unit turns through a full rotation without binding, noise, or a jump in motor current.
- The retorque is scheduled, with the date and the technician's name recorded.
If a witness mark has moved at the retorque check, loosen that bolt and its opposite, then inspect the seat and bolt. A stretched or damaged bolt should be replaced, not retightened. If several bolts moved on the same side, suspect seat flatness and go back to step 1.
If rotation feels tight after tightening, the housing may be distorted. Loosen the bolts, check the seat, and restart the staged passes. Poor flatness is more likely than a bearing fault in this case.
Variations That Change the Procedure
The sequence above holds for most units. A few cases change the details.
- Worm gear and double worm drives. These are self-locking and often carry high holding loads. Follow the manual closely for the worm gear slew drive you installed.
- Spur gear drives. Solar tracker drives such as the SP-I series may use different bolt counts and mounting patterns. Confirm the pattern before numbering the bolts.
- Standalone bearings. If you are fitting a slewing bearing with an external gear, the same cross-pattern logic applies, but check gear backlash after tightening.
- Customized units. Special bolt circles or non-standard flanges come with their own drawing. Use that drawing's torque schedule, not a catalog default. Our customized slew drive orders ship with the data you need for this.
At Luoyang Slewring Bearing Co., Ltd., every slew bearing goes through CMM three-coordinate inspection before shipment, and you can read more on our slew drive quality control page. That inspection helps ensure the flange you bolt down starts out flat and within tolerance. The remaining flatness work is on the structure side.
These units run in real heavy-duty service. A Netherlands material handling manufacturer ordered 50 units of WEA9-62-25HR for truck-mounted cranes. A Houston, Texas engineering machinery manufacturer ordered 100 units of SEA21-125-25HR(2) for slewing platforms. Both applications put repeated swing loads on the mounting bolts, so a staged, verified bolting routine fits them.
Our factory is ISO 9001:2015 certified, and confirmed manufacturing defects are replaced free under a 2-year extended quality warranty. If a torque value is missing from your paperwork, our engineers respond within 48 hours. Your installation is complete when all bolts hold the specified value after the retorque check and the witness marks stay unbroken.
Request Your Custom Slew Drive or Bearing Spec
Tell us your load, speed, and environment — receive a tailored 100–5000 mm slewing drive or slewing bearing proposal with 3D drawings within 24 hours.
 WhatsApp

 +8613903880726