



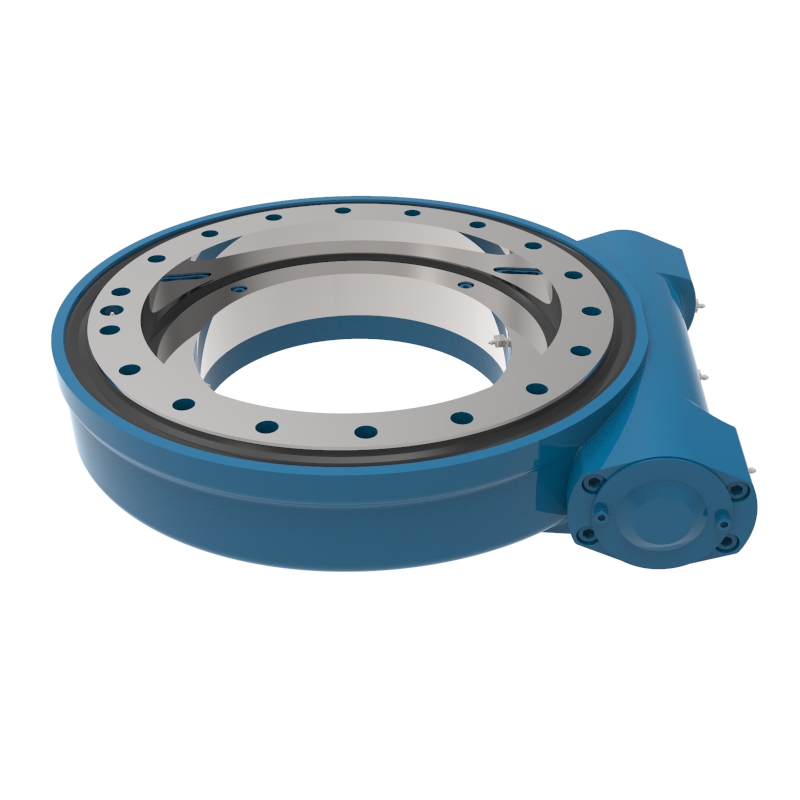
What is a slew drive rebuild? It is the workshop process of disassembling, inspecting, repairing, reassembling, and testing a serviceable rotary drive assembly that combines a slewing bearing, worm gear set, housing, seals, and mounting interfaces.
A successful slew drive rebuild does more than stop an oil or grease leak. It must restore controlled gear engagement, stable bearing support, correct lubrication flow, and repeatable rotation under no-load conditions. If one of these checks is skipped, the assembly may turn on the bench but fail early after installation.
This guide is for repair teams working on serviceable worm-driven units. It provides a repeatable inspection and acceptance sequence for workshop technicians, maintenance managers, and buyers evaluating repair capability. Where the original manufacturer’s drawing, service manual, torque specification, preload method, or lubricant grade is available, that document must control the final settings.
Set the rebuild scope before opening the housing
Start by deciding whether the unit is a candidate for repair or should be replaced. A serviceable drive with intact housing bores, usable gear teeth, and a bearing that can meet its original running requirements may be rebuilt. A drive with cracked structural parts, heavily damaged raceways, or tooth damage across a large working area may require a replacement assembly instead.
Do not begin by ordering seals alone. Seals are wear items, but seal failure can also be a symptom of excess internal movement, blocked grease paths, overfilled lubricant, misalignment, or housing distortion. Replacing a seal without finding the cause often creates a short-lived repair.
Record the starting condition
Before disassembly, photograph the drive from all sides and record its identification details. Note the drive orientation, motor position, mounting direction, grease fitting locations, visible leakage paths, and the operating complaint. This record prevents assembly errors and gives the repair team a reference when the unit is tested again.
- Confirm the application: Record whether the drive is used in a solar tracker, crane, turntable, forestry attachment, aerial platform, or other rotating machine.
- Check operating symptoms: Identify sticking, free play, abnormal noise, slow rotation, leakage, heat, or loss of holding function.
- Identify the original lubricant: Use the equipment manual, supplier information, or lubricant record. Do not mix grease types unless their compatibility is confirmed.
- Keep matched parts together: Mark the worm, gear ring, bearing components, shims, covers, and fasteners so their original locations can be traced.
- Obtain the control documents: The original assembly drawing, torque chart, preload instruction, backlash requirement, and seal dimensions are the documents that block final assembly if missing.
A rebuild can proceed through cleaning and basic inspection without every document. It cannot be accepted for field use without knowing the manufacturer’s required preload, gear clearance, lubricant, and mounting fastener requirements.
For drives that show major ring or raceway damage, compare the repair cost and downtime risk against a replacement Slew Drive. Luoyang Slewring Bearing Co., Ltd. supplies standard products from a one-set MOQ, while customized product orders begin at five sets. This can help maintenance teams assess replacement options when repair is not technically sound.
Prepare the tools, parts, and clean work area
Cleanliness is part of the repair, not a final cosmetic step. Abrasive debris left in the bearing raceway or worm mesh can create scoring during the first rotation cycle. Prepare a covered bench, clean containers for components, lint-free wipes, approved cleaning fluid, and protection for exposed machined surfaces.
Use lifting equipment sized for the assembly and secure the drive against rolling or rotation. A partially disassembled unit can shift suddenly when the worm or cover is removed. Keep hands out of pinch areas between the worm, gear ring, and housing.
| Item | Why it is needed | What to verify before use |
|---|---|---|
| Service drawing or repair record | Controls component order, preload, backlash, lubricant, and torque requirements | Correct model and revision are identified |
| Dial indicator and rigid fixture | Checks axial, radial, and rotational movement where required | Indicator is stable and can be zeroed on the housing |
| Gear marking compound | Shows the worm-to-gear contact pattern | Compound can be applied in a thin, visible film |
| Torque tool | Applies the specified fastener tightening method | Tool range suits the fasteners and is in calibration |
| Specified lubricant | Protects the bearing and gear mesh during test and operation | Type and compatibility match the original requirement |
| New seals and approved installation tools | Restores contamination exclusion and lubricant retention | Seal size, lip direction, and material match the drive |
Do not use a screwdriver, sharp punch, or damaged socket as a seal installation tool. These can cut the sealing lip, distort the metal case, or score the bore. Use a driver that supports the seal evenly around its outside diameter.
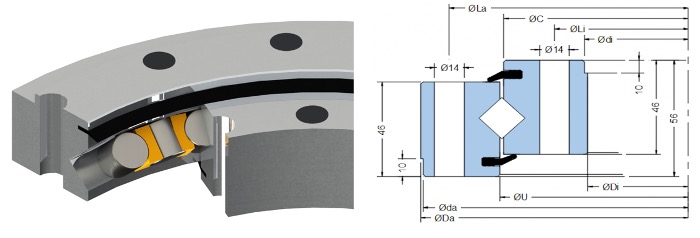
For bearing and raceway evaluation, a replacement Slewing Bearing may be more appropriate than attempting to reuse damaged rolling surfaces. This is especially true when corrosion pits, brinelling marks, cracking, or metal flaking are found in a load-carrying area.
Request Your Custom Slew Drive or Bearing Spec
Tell us your load, speed, and environment — receive a tailored 100–5000 mm slewing drive or slewing bearing proposal with 3D drawings within 24 hours.
Inspect the seals, gear teeth, bearing surfaces, and housing features
Inspect parts after cleaning, not before. Old grease can hide cracking, wear tracks, seal damage, and pitting. Dry the parts fully after cleaning so that water or solvent does not enter the reassembled drive.
Inspect seals and sealing lands
Reject a seal that has a hardened lip, tear, deformation, corrosion, or embedded debris. Also inspect the shaft or rotating sealing land. A new seal cannot compensate for a deeply scored, corroded, or out-of-round surface.
Check the seal bore for burrs and sharp edges. Remove only the burrs that interfere with installation; do not alter the bore size. If the bore is loose, cracked, or distorted, the housing needs repair or replacement because the seal may spin or leak even when installed correctly.
Inspect worm and gear teeth
Examine the full circumference of the gear ring and every accessible worm thread. Rotate the assembly slowly through its working range. Look for chipped teeth, metal pickup, polishing concentrated at one edge, corrosion pitting, displaced material, and abnormal tooth root damage.
Uniform polishing can be normal on a used gear set. Localized contact at one end of the tooth is not. It commonly points to alignment error, incorrect shim position, damaged bearing support, housing distortion, or incorrect worm location.
Inspect bearing raceways and rolling elements
Check the bearing raceways for indentation, flaking, discoloration, corrosion, scoring, and uneven tracks. Turn the bearing slowly by hand after cleaning. A rough spot, repeating click, or intermittent resistance should be investigated before the drive is reassembled.
Do not assume that a bearing is acceptable because it rotates. A drive may rotate with damaged raceways yet produce rising backlash, vibration, or uneven load transfer in service. For high-load applications, such as cranes, excavators, or material handling equipment, the bearing condition deserves the same attention as the worm gear.
Luoyang Slewring Bearing Co., Ltd. uses CMM three-coordinate inspection and dynamic load testing for its slewing bearings. That factory-level control illustrates why dimensional relationships and load-path checks matter during repair. A workshop may not duplicate every production test, but it should document its own inspection results and reject parts that cannot meet the applicable repair standard.
Checklist for rebuild acceptance from seal installation to no-load testing
Use this sequence after all reusable components have passed inspection and replacement parts are confirmed. The order matters. Installing the seal before verifying internal positioning, or setting backlash before bearing support is established, can hide the cause of a poor result.
| Acceptance step | Required action | Pass condition | Failure reason and recovery |
|---|---|---|---|
| 1. Seal installation | Clean the bore and sealing land. Lightly lubricate only if the specified procedure calls for it. Press the seal squarely with an even driver. | Seal sits evenly, lip faces the required direction, and no lip is rolled or cut. | A cocked or damaged seal can leak immediately. Remove it and install a new seal; do not reuse a distorted seal. |
| 2. Bearing preload | Assemble bearing-related parts, shims, retainers, and fasteners using the original setting method. | Measured movement and turning condition meet the manufacturer’s repair specification. | Excess movement may cause gear separation. Excess preload can create heat and heavy turning. Recheck shim selection, seating faces, and fastener sequence. |
| 3. Gear contact pattern | Apply a thin marking compound to several gear teeth. Rotate through the mesh in both directions under controlled resistance. | Pattern is positioned and distributed according to the original gear design requirement. | One-sided contact suggests misalignment or incorrect positioning. Inspect bearing seating, worm support, housing faces, and shim arrangement. |
| 4. Lubrication | Fill or apply the specified lubricant through the approved points. Rotate the assembly to distribute it through the mesh and bearing path. | Lubricant reaches the intended areas without blocked fittings or uncontrolled escape from seals. | Dry contact can score parts during testing. Leakage or blocked flow requires seal, fitting, passage, or quantity checks. |
| 5. Backlash verification | Lock the input side as required, measure output movement at the specified reference point, and check more than one rotational position. | Measured backlash stays within the original acceptance requirement across the required rotation range. | High localized backlash can indicate tooth wear, bearing movement, or a damaged gear zone. Low clearance can cause binding and heat. |
| 6. No-load run testing | Run the assembled drive in both directions at the approved test input condition. Observe rotation, sound, leakage, and temperature trend. | Rotation is consistent, no abnormal noise occurs, and no leakage or progressive resistance is observed. | Noise, heat, or tight spots require the team to revisit preload, contact pattern, lubrication, and alignment before release. |
This acceptance sequence is not a substitute for the original product specification. It is a controlled way to avoid a common workshop error: approving a rebuilt unit after only a hand-turn check. Hand rotation can reveal a severe bind, but it does not prove correct contact, internal support, lubricant distribution, or operational consistency.
Run the no-load test and document the release result
Conduct the no-load test only after the housing is fully assembled and all required covers, seals, lubrication fittings, and retention parts are installed. The drive should be secured in a fixture that prevents unwanted movement while allowing the output to rotate safely.
Run in both directions because the worm gear may show different behavior under reverse rotation. Listen for repeating clicks, grinding, sudden resistance, or a change in sound at the same output position. These signs often match a local tooth defect, raceway problem, contamination, or mounting distortion.
Use a practical release record
The release record should allow another technician to understand what was inspected and what was changed. It does not need to be complicated, but it must be traceable to the specific drive.
- Drive model, serial number, and application
- Customer-reported fault before repair
- Parts replaced, including seals, bearings, worm components, or fasteners
- Lubricant identification and fill method
- Gear contact pattern result and any adjustment made
- Preload and backlash measurements compared with the approved reference
- No-load test direction, observations, and final inspector approval
If the drive passes no-load testing but will return to a harsh environment, inspect the external protection system as well. Luoyang Slewring Bearing Co., Ltd. offers slew drives with protection up to IP66 and anti-corrosion performance up to C4H, depending on the selected product. Those features are relevant when replacement is being considered for wet, dusty, coastal, or outdoor equipment; they do not repair a damaged existing housing or seal land.
For applications that require higher holding stability or load distribution, the drive configuration may affect the repair decision. A Double Worm Slew Drive may be selected for certain heavy-duty or precision-sensitive systems, while a single-worm arrangement may remain suitable where the original machine design supports it. Do not change drive type without reviewing mounting loads, input arrangement, output torque needs, and control requirements.
Prevent repeat failures by matching the repair to the application
The final check is not only “does it run?” Ask whether the rebuilt unit addresses the operating condition that caused the damage. A solar tracker, a shipboard crane, a forestry grapple, and a rotating platform expose the same basic components to very different contamination, loading, duty-cycle, and alignment risks.
| Observed condition | Likely area to investigate | Repair limit |
|---|---|---|
| Repeated seal leakage | Seal lip damage, scored sealing land, overfilling, blocked venting, or excessive internal movement | A seal-only repair is not suitable until the leakage cause is identified. |
| Tight rotation at one position | Damaged tooth zone, raceway defect, contamination, or housing misalignment | Do not release after forcing the unit through the tight area. |
| Excessive free play | Bearing wear, incorrect preload, gear wear, loose mounting interfaces, or internal fastener issues | Backlash adjustment alone may not correct worn bearing surfaces. |
| Noise under reversal | Gear mesh pattern, loose worm support, damaged teeth, or inadequate lubricant distribution | A quiet hand-turn check does not clear the unit for powered operation. |
| Corrosion after outdoor service | Seal condition, coating damage, water ingress, lubricant condition, and storage practice | Replace structurally weakened or deeply pitted load-carrying parts. |
Real application conditions should guide the sourcing decision. For example, Luoyang Slewring Bearing Co., Ltd. supplied SP-I 0841 units for a U.S. utility-scale solar tracker project with IP65 protection for desert sites. That is an example of matching drive protection to a known environment, not a universal specification for every rebuilt or replacement drive.
For repair teams that need an engineering review instead of a standard replacement, a Customized Slew Drive can be evaluated around the working load, speed, mounting interface, and environmental exposure. The company provides technical proposals within 24 hours and supports sample orders for testing and evaluation.
A rebuilt unit is ready for release when its seal installation is verified, bearing preload meets the controlling reference, gear contact is acceptable, lubrication is confirmed, backlash is checked across the required range, and no-load testing shows stable rotation in both directions. If any one of these results is uncertain, return to the related assembly step before the drive is installed on equipment.
Request Your Custom Slew Drive or Bearing Spec
Tell us your load, speed, and environment — receive a tailored 100–5000 mm slewing drive or slewing bearing proposal with 3D drawings within 24 hours.
 WhatsApp

 +8613903880726