


Why Does the Slewing Bearing Shake After Installation?
What is Slewing Bearing?
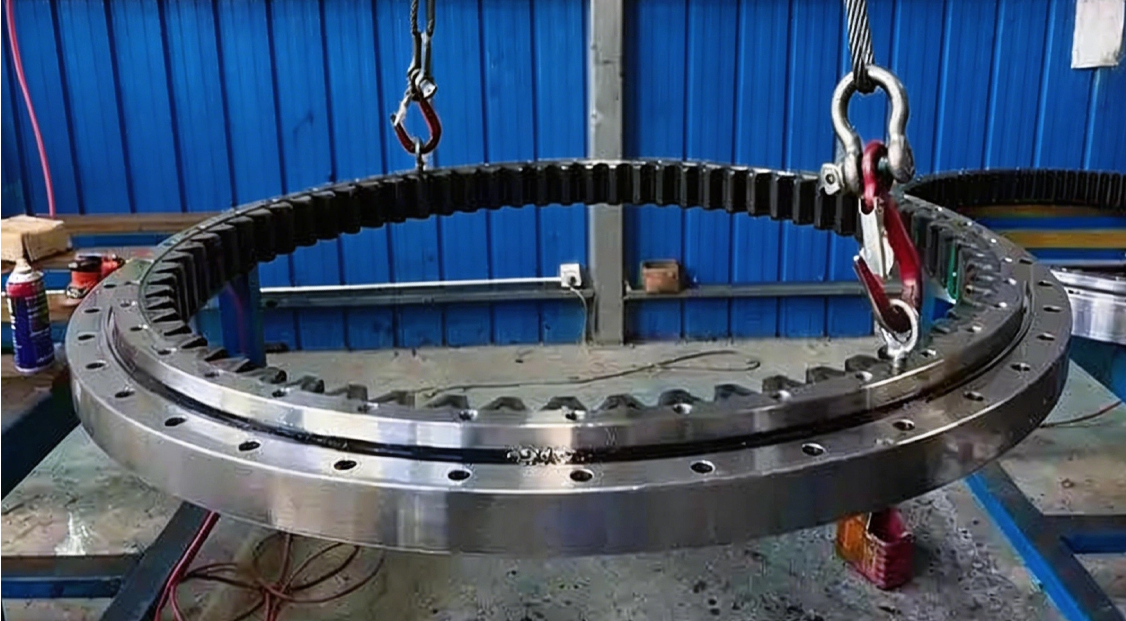
A slewing bearing, also known as a slewing ring or turntable bearing, is a large-sized rotational component that can simultaneously support axial loads, radial loads, and tilting moments. Unlike standard bearings, they are designed to handle slow-speed, heavy-duty oscillating or rotating movements. They typically consist of an inner ring, an outer ring, rolling elements (balls or rollers), and sometimes a sealing mechanism and gear teeth integrated into one of the rings.
How Does a Slew Bearing Work?
The working principle is based on the smooth rolling action between the rings. The inner ring is typically bolted to a fixed or rotating structure (like a vehicle chassis or a tower), while the outer ring is bolted to the rotating part (like a crane boom or a platform). As the rolling elements travel through the raceways, they facilitate rotation with minimal friction while transferring all the complex loads from one structure to the other. If gear teeth are present, a small driving pinion (often part of a LyraDrive slew drive) meshes with the bearing's gear to provide controlled rotational force.
Applications of Slewing Bearings
Thanks to their robust design, slewing bearings are used across countless industries, including:
Construction Machinery: Excavators, cranes, concrete pumps.
Renewable Energy: Wind turbine yaw and pitch systems.
Industrial Equipment: Robotics, welding positioners, rotary tables.
Medical Technology: CT scanners, radiotherapy equipment.
Material Handling: Stackers, reclaimers, port machinery.
Defense & Aerospace: Radar antennas, missile launchers, turrets.
How to Install a Slewing Bearing Correctly?
Correct installation is the single most important factor determining the lifespan, safety, and performance of a slewing bearing. Even the highest quality bearing from a manufacturer like LyraDrive will fail prematurely if installed improperly. The process requires precision, cleanliness, and strict adherence to technical specifications. Follow these detailed steps for a successful installation:
Before You Begin: Preparation
Read the Manual: Carefully study the manufacturer's installation manual and technical drawings. Note the specified bolt torque, lubricant type, and any specific instructions for your bearing model.
Prepare the Tools: Gather all necessary tools, including a high-quality calibrated torque wrench, clean lint-free rags, the specified lubricant, and lifting equipment capable of handling the bearing's weight without damage.
Inspect the Bearing: Upon unpacking, inspect the slewing bearing for any shipping damage. Check that it rotates smoothly and that the gear teeth (if applicable) are undamaged. Do not remove the rust-preventative coating until immediately before installation.
Step-by-Step Installation Guide
1. Inspect and Prepare the Mounting Structure
Flatness is Critical: The mounting surfaces on both the structure (e.g., machine frame) and the mating part (e.g., rotating platform) must be perfectly flat. Use a precision straightedge and feeler gauge to check. Any deviation can distort the bearing's raceway when bolts are tightened, leading to binding, uneven wear, and shaking. As a rule of thumb, flatness should be within 0.1 mm.
Surface Finish & Rigidity: The surfaces must be clean, free of paint, burrs, rust, or old gasket material. A rough surface finish can prevent proper clamping force. Crucially, the supporting structure itself must be rigid enough (as discussed in Section 5.2) to prevent flexing under load.
Check Bolt Holes: Ensure all bolt holes in the structure align perfectly with the bearing's threaded or through holes. Do not force alignment.
2. Prepare the Slewing Bearing for Installation
Remove Rust Preventative: Just before installation, carefully remove the rust-preventative coating from the mounting surfaces using a recommended solvent. Do not allow the solvent to enter the raceway.
Initial Lubrication: Apply the specified initial grease to the raceway via the lubrication fittings (grease nipples). Rotate the bearing slowly and evenly while greasing to ensure the lubricant is distributed throughout all the rolling elements and raceways. This is vital to prevent metal-to-metal contact during the first runs.
3. Position the Slewing Ring
Lifting and Handling: Use lifting eyebolts in the threaded mounting holes (if provided) and a spreader bar to lift the bearing evenly. Avoid any impact that could damage raceways.
Alignment and Seating: Gently lower the bearing onto the mounting structure, aligning all bolt holes precisely. The bearing should sit flat on the structure without any rocking. Never hammer the bearing into place.
Reference Surfaces: If the design includes a spigot (a raised circular rim) or a locating shoulder on the structure, ensure the bearing is snugly fitted against it to guarantee accurate centering.
4. Tighten Mounting Bolts with Precision
This is the most critical step where most errors occur.
Check Bolt Quality: Use only the high-strength bolts specified by the manufacturer (e.g., grade 10.9 or 12.9). Do not reuse old bolts. Apply a small amount of oil to the bolt threads and under the bolt head (unless a specific locking compound is required) to achieve accurate torque.
Follow the Correct Sequence: Tightening must be done in a progressive cross-pattern sequence. This ensures the bearing is drawn down evenly and prevents distortion.
Start by tightening all bolts by hand.
Perform the first pass at approximately 30% of the final torque, following the cross-pattern.
Perform a second pass at approximately 60% of the final torque, again in the cross-pattern.
Perform the final pass at 100% of the specified torque, using the same critical cross-pattern. Use a calibrated torque wrench for accuracy.
Check for Gaps: After final torquing, use a 0.03mm feeler gauge to check for any gap between the bearing ring and the mounting structure. The gauge should not be able to penetrate anywhere.
5. Post-Installation Check
Rotational Test: After installation, rotate the mounted structure or the bearing ring by hand (or with the drive system at low speed). The rotation should be smooth, uniform, and free of any catching, grinding noises, or detectable wobble (shake).
Final Lubrication: Apply the final, operational lubrication as specified in the manual.
By meticulously following these steps, you ensure that the slewing bearing is correctly seated and preloaded, maximizing its operational life and preventing the common problem of post-installation shaking. If you have any doubts during installation, the team at LyraDrive is always available to provide technical support.
Why Does the Slewing Bearing Shake After Installation?
Experiencing shaking or wobbling after installation indicates a problem that needs immediate attention. Based on common industry analysis and our experience at LyraDrive, the main reasons are:
1. Loose or Improperly Torqued Mounting Bolts
This is the most frequent cause. If the mounting bolts (for either the inner or outer ring) are not tightened to the correct torque in the proper sequence, they can loosen under load. This creates play between the bearing and the structure, leading to visible shaking and potential bolt failure.
2. Insufficient Rigidity of the Support Structure
If the steel structure onto which the bearing is mounted is not stiff enough, it will flex or deform under heavy or eccentric loads. This structural deflection is then transferred to the bearing, causing it to tilt and wobble, even if the bearing itself is perfect.
3. Severe Overloading or Eccentric Loads
Operating the equipment beyond its rated capacity can cause several problems:
Immediate Overload: The bearing may be momentarily overloaded, causing elastic deformation and shaking.
Permanent Damage (Raceway Brinelling): Repeated severe overloading or running with constant eccentric loads can cause the rolling elements to dent the raceways. This creates permanent, uneven spots that cause the bearing to shake every time the rollers pass over them, effectively increasing the internal clearance beyond acceptable limits.
4. Internal Clearance Issues
Every slewing bearing is manufactured with a specific internal clearance (the small amount of play between the rolling elements and raceways). If the clearance is too high for the application, or if it has increased due to wear or deformation (as mentioned above), shaking will result.
5. Contamination or Lack of Lubrication
If dirt, sand, or debris enters the raceway, or if lubrication is insufficient, it can cause uneven rolling and abrasive wear, eventually leading to increased clearance and shaking.
How to Solve the Shaking Phenomenon in a Slewing Bearing?
Addressing shaking depends on its cause:
For Loose Bolts: Immediately stop operation and tighten all mounting bolts to the specified torque using the correct cross-pattern sequence. Check the bolts periodically afterward.
For Structural Issues: The supporting structure must be reinforced by adding gussets or increasing its thickness to eliminate flexing.
For Overload Problems: Review operational procedures to ensure the machine is used within its rated capacity. If damage has already occurred (like brinelling), the bearing likely needs professional inspection and possibly replacement.
For Contamination: Improve sealing and establish a regular cleaning and lubrication schedule as per the maintenance manual.
If you suspect internal damage (like raceway wear or brinelling), it is crucial to contact the bearing manufacturer immediately. Continuing to operate a damaged bearing can lead to catastrophic failure.
LyraDrive: Manufacturer of Customised Slewing Bearings
At LyraDrive, we understand that every application has unique demands. As a dedicated manufacturer of high-quality slew drives and slewing bearings, we go beyond standard solutions.
Our core strength lies in providing customised slewing bearings tailored to your exact specifications. Whether you need a specific Single Row Ball Bearing with non-standard gear teeth, a Flanged Ball Bearing with special mounting holes, or a high-precision Crossed Roller Slewing Bearing for a robotics application, our engineering team works closely with you to design and manufacture the perfect component.
We control every aspect of the process, from material selection and heat treatment to precision machining and assembly. This ensures that your customised bearing delivers optimal performance, longevity, and reliability in its specific operating environment. We also integrate our expertise in slew drives to provide complete, efficient rotation solutions.
Partner with LyraDrive for your next project and experience the difference of truly customised, high-performance slewing bearings.
FAQs on Slewing Bearing Shaking After Installation
Q: Can I fix a shaking slewing bearing myself?
A: Only if the cause is simple bolt loosening. If shaking is due to structural flexing or suspected internal damage, consult a qualified engineer or the manufacturer like LyraDrive.
Q: How much shake is too much?
A: Any visible or palpable wobble during operation is generally unacceptable. Refer to your equipment's manual for specific runout tolerances. If in doubt, contact us.
Q: Does the type of slewing bearing affect its tendency to shake?
A: Yes. For example, crossed roller bearings are inherently more rigid and precise than single-row ball bearings, making them less prone to certain types of wobble under complex loads. Choosing the right bearing type for your application is crucial.
Q: How can LyraDrive help if my bearing is shaking?
A: Our technical team can help diagnose the root cause. If a replacement is needed, we can design and manufacture a customised slewing bearing that addresses the specific load, speed, and environmental conditions of your machinery, ensuring a perfect fit and reliable, shake-free operation.